
The Art of Layers: How to Achieve a Painterly Look
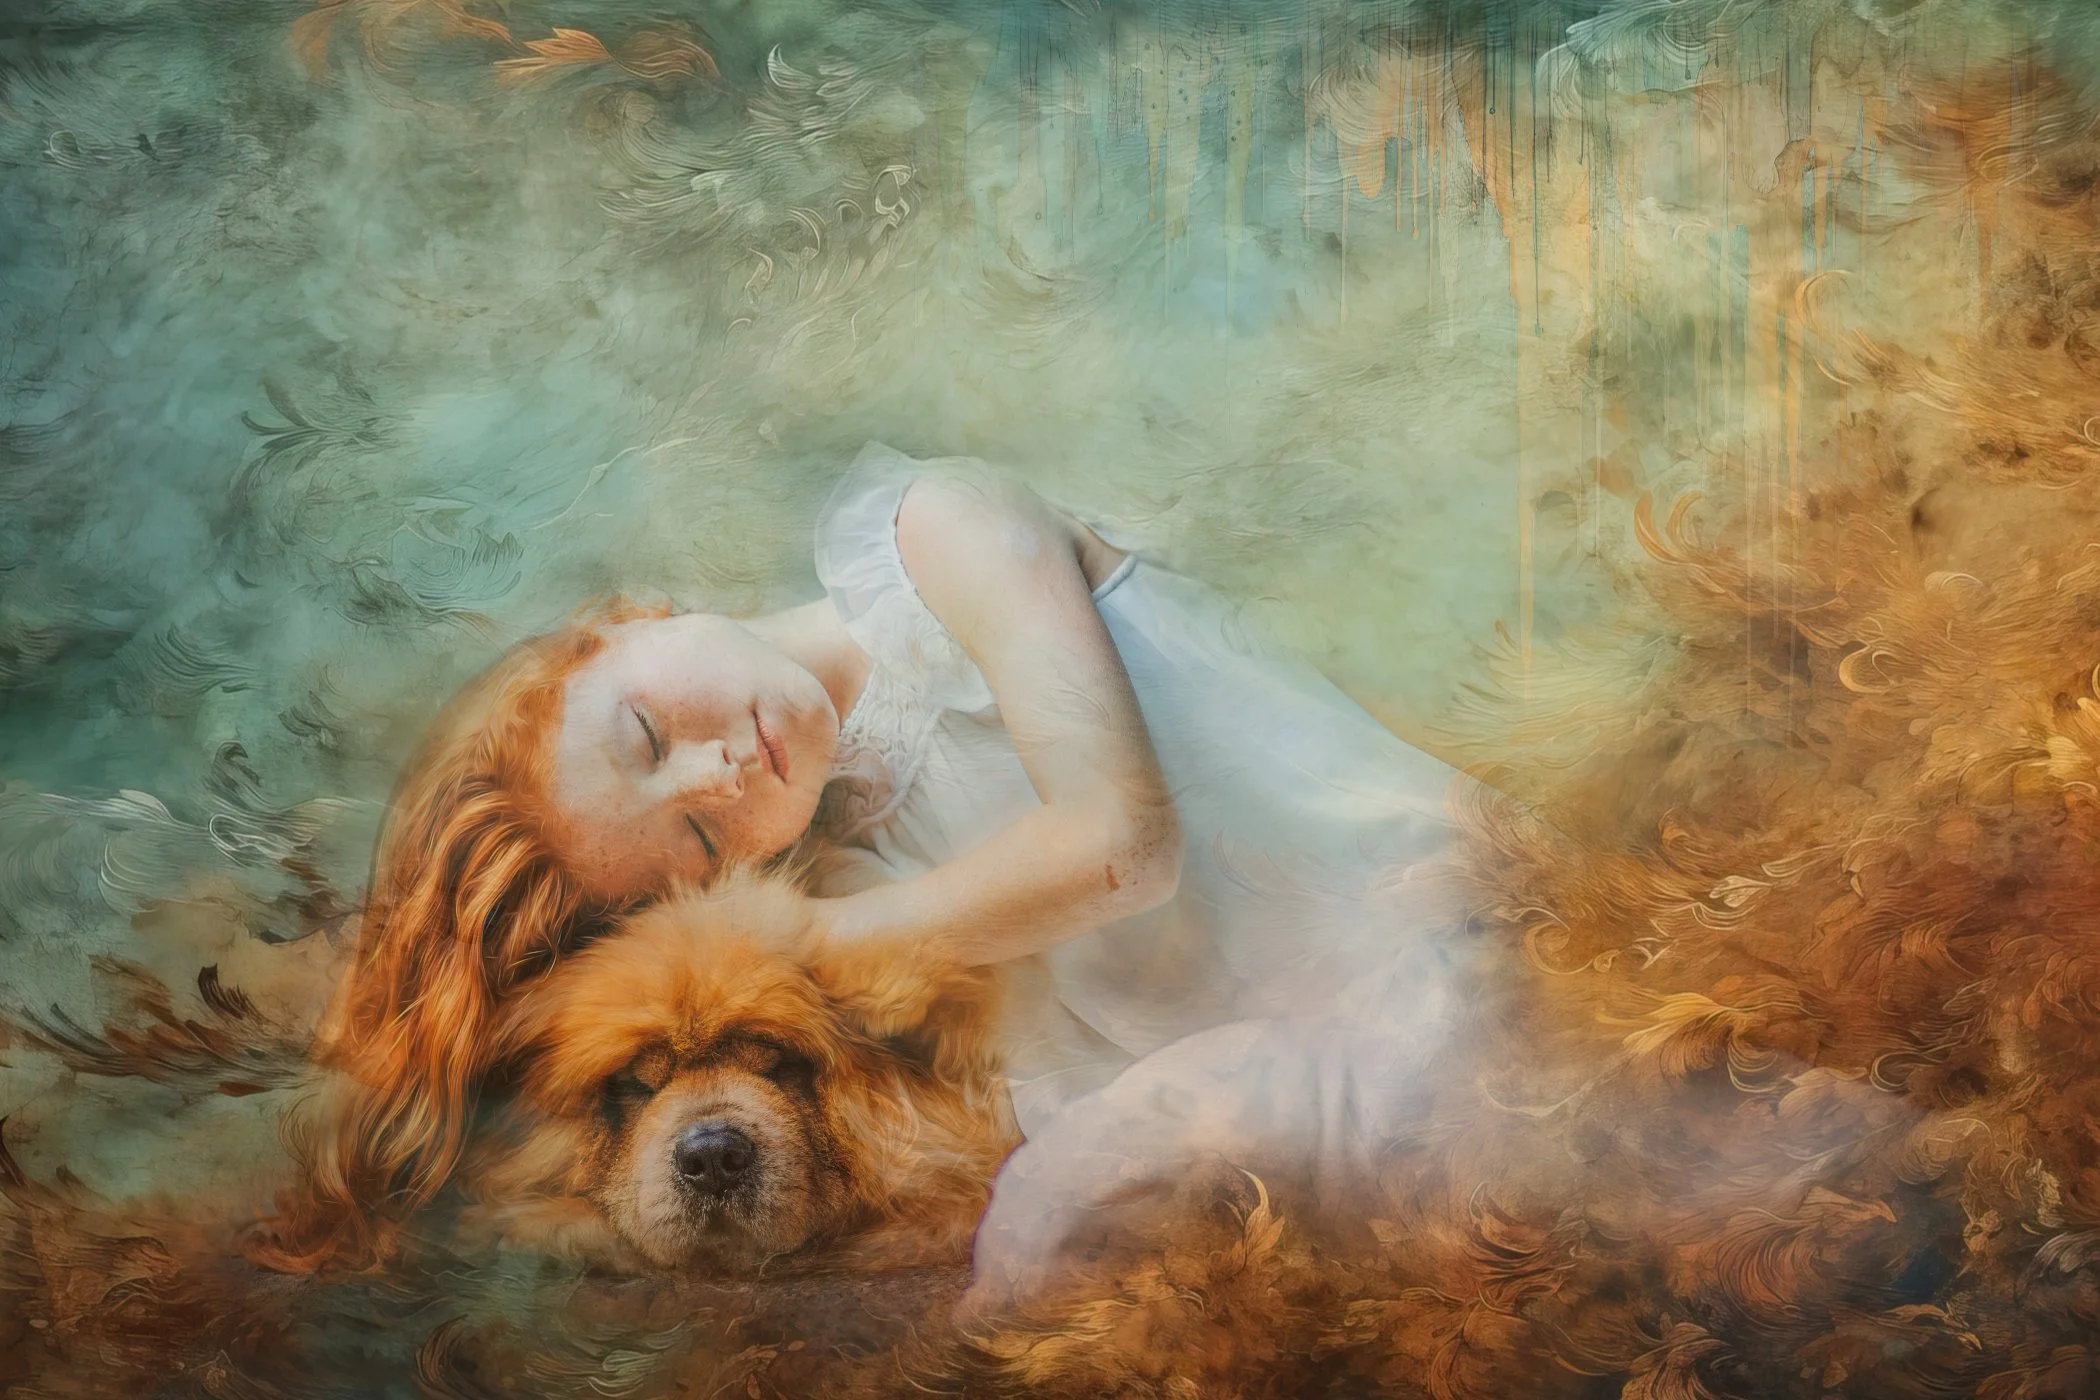
Creating a painterly look from photographs using painterly backgrounds and textures is a creative process that allows you to blend your photos with the aesthetics of traditional painting. This technique can transform your images into unique works of art.
Photography, as an art form, transcends mere documentation. It's a medium that allows photo artists to capture emotions, tell stories, and provoke thought through imagery. Fine art photography is a genre that focuses on creative expression and aesthetics rather than just factual representation. In particular, it is a realm where creativity knows no bounds, and the use of post-editing and compositing techniques plays a pivotal role in pushing the boundaries of visual storytelling and artistic expression.
What is Compositing?
Compositing is the process of combining multiple images or elements to create a single, cohesive image. This technique allows artistic photographers to construct scenes that go beyond the limitations of a single shot.
Fine art photographers often use compositing to tell intricate visual stories. Either two or more images are combined to convey a narrative or evoke a sense of artistic expression. Each element added contributes to the overall story being told. By blending elements, artists can provoke thought and encourage viewers to contemplate the underlying message or theme of the final composite image.
Textures, painterly backgrounds and overlays can be applied to images to give them a unique, textured look. This can add depth and even a painterly look to photographs and enhance the artistic appeal.
Step 1: Choose Your Photograph
Start by selecting a photograph that you want to transform into a painterly image. Consider the subject, composition, and overall mood of the photo. Images with strong textures, interesting lighting, or a central focal point tend to work well for this technique.
Choose your photograph and upload it into an editing software that has the ability to use layers like Luminar Neo. (Note: this is an affiliate link, this link will give you a % off to try Luminar Neo)

Step 2: Edit Your Photograph
In this step, take the time to edit your original photograph, making necessary adjustments to enhance its overall quality. This can include color correction, cropping, beauty retouching, cloning, etc.
In Luminar Neo, I often edit with:
Enhance AI
Develop
Cropping

Step 3: Select Painterly Backgrounds and Textures
Search for painterly backgrounds and textures that complement your photograph. These can be found in various sources, or you can create your own by photographing textures like canvas, paper, or brushstrokes. Ensure that the chosen backgrounds and textures match the style and color palette you want to achieve.
Texture Pictured Below is from the Old Masters Vol. 1

Step 4: Layer
Place the chosen painterly background or texture on a new layer below your photograph. (You might have to duplicate your photo to move your texture layer below it.) Adjust the size and position of the background layer to cover the entire image. Keep this background layer at 100% opacity.
Note: When using Luminar and bringing in a new layer, the default opacity is always 50%. Move the slider to 100%.

Step 5: Duplicate Background Layer
Once you have your background layer set and content with it's position, duplicate this layer and move the duplicated layer above your photo. This is the layer you will now lower the opacity slightly and selectively mask or subtly.

Step 6: Opacity Adjustments
Opacity adjustments are essential for blending the top background layer with the underlying photo layer effectively. Lowering the top layer's opacity gradually reveals the photo layer beneath, allowing these two layers to merge visually.
Here is how to do this.
Opacity
Opacity - Opacity adjustments are essential for effectively blending the top background layer with the underlying photo layer. Lowering the top layer's opacity gradually reveals the photo layer beneath, allowing these two layers to merge visually.
At 100% opacity, the top layer completely obscures the layer below, meaning there is no transparency. Conversely, at 0% opacity, the top layer becomes invisible, indicating that its opacity is at 0%.
To achieve the desired visual effect when blending these two layers, you can adjust the opacity slider incrementally. Depending on the specific layers you are working with, you will move the slider to find the optimal balance between the background texture and the photo layer. This process can result in subtle or dramatic changes, depending on your creative intent and the desired impact on the final composition.
Note: Sometimes, in fine art compositing, adjusting the opacity is all you need to do. Other times, you might want to go further and mask.

Step 7: Masking
Masking is a powerful technique that empowers you to control which parts of your photo or background layer are hidden or revealed. It also enables you to add depth and visual interest to your composition.
Here's how to utilize masking effectively:
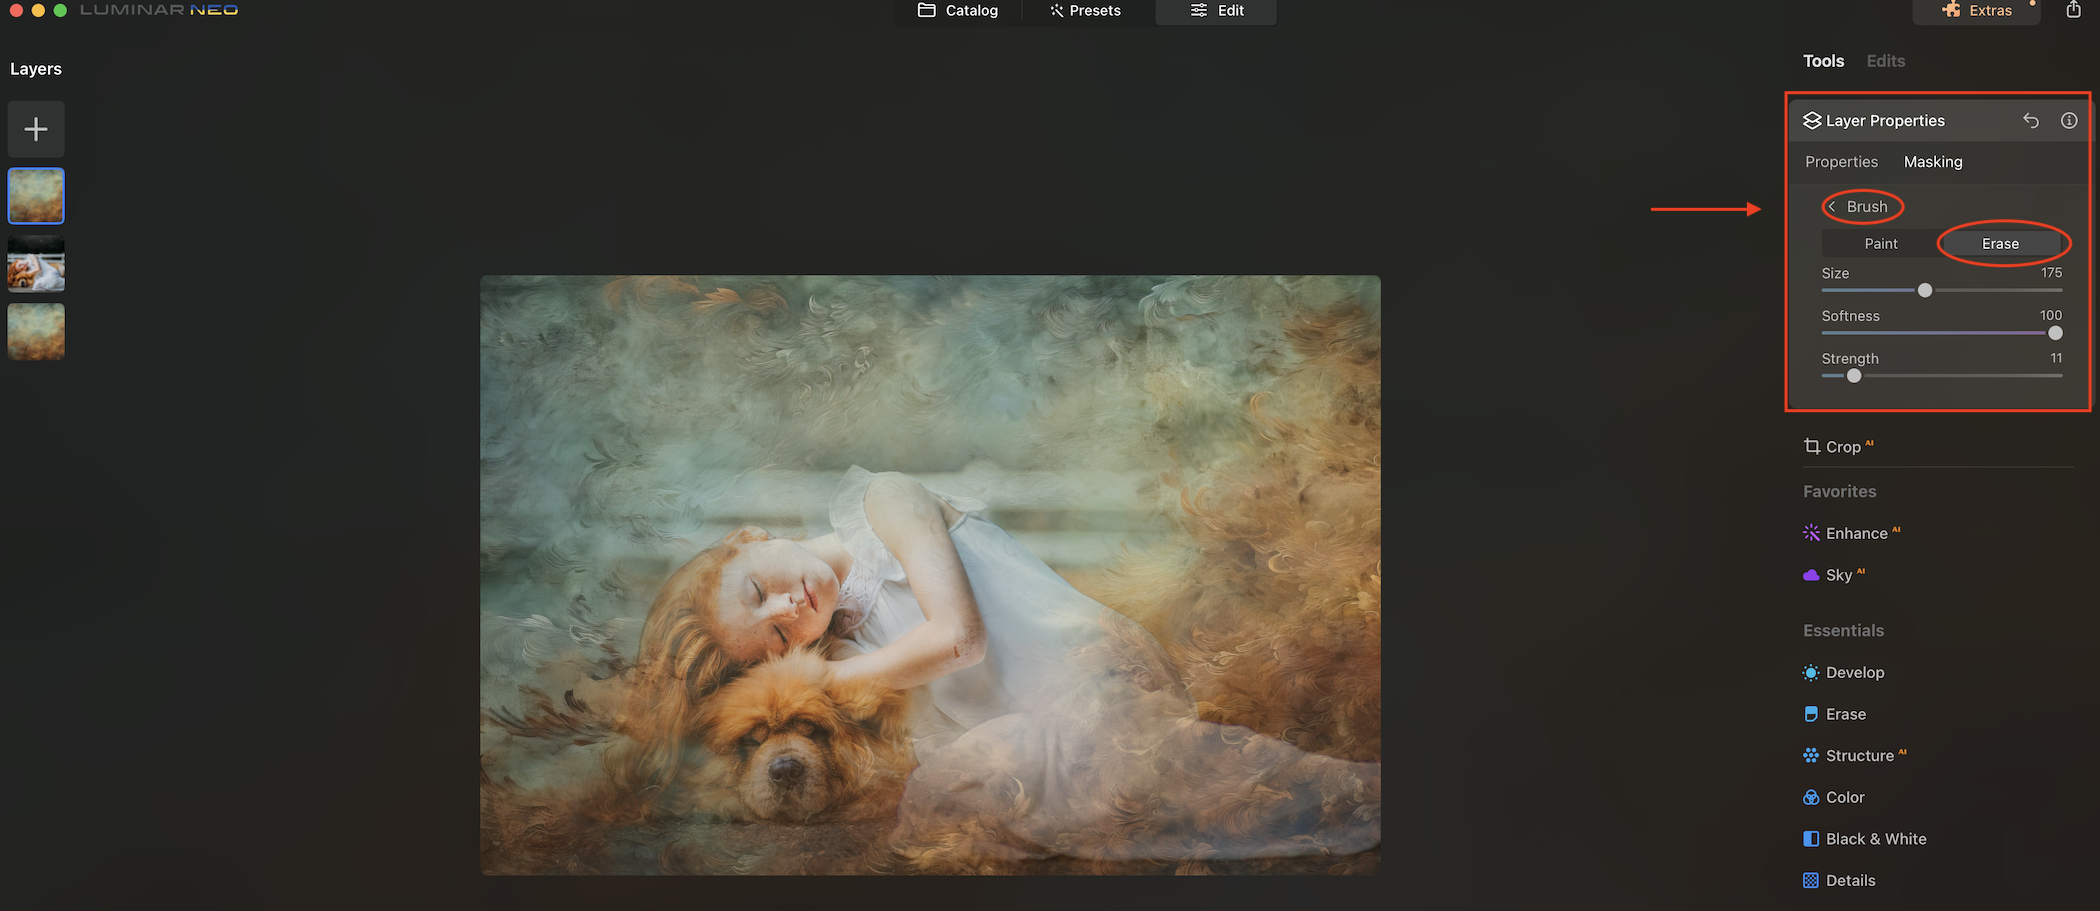
Masking - Begin by selecting a soft brush for masking, usually with a softness setting of 100%. The key is to adjust the opacity of the brush depending on how much you want to hide or emphasize in your image. This process allows you to gradually reveal or conceal specific areas of interest. Erase will erase areas of the layer and Brush will brush in areas of the layer.
Choosing the Layer - You have the flexibility to mask either the background layer on top or the photo layer itself. Masking the photo layer is particularly useful for eliminating distractions and emphasizing the main subject. This selective approach ensures that you preserve the essential details of your subject.
Selective Application of the Painterly Effect - The beauty of masking lies in its ability to selectively preserve the painterly effect on certain portions. This way, you can maintain a balance between the painterly texture and the clarity of your subject's features.
AI-Assisted Masking - For a quicker masking process, consider using AI tools to automatically select your subject. While AI can do an excellent job, you might still need to refine the edges or make adjustments where AI may not perform perfectly. This fine-tuning with a masking brush ensures a seamless blend between your subject and the painterly background.
By using masking in this manner, you can achieve a harmonious and balanced painterly effect that draws attention to your subject while integrating the painterly texture seamlessly, resulting in a visually captivating final composition.
This blending and masking is where you make the creative decisions to bring your fine art painterly composite to life, infusing it with the unique artistic vision and style that transforms a simple photograph into a captivating and expressive masterpiece.
Step 8: Blending Modes
Optionally, you can explore blending modes. Blending modes offer a variety of ways to combine the layers in your composition, allowing you to achieve different visual results. Most of the time, you would use the default blending mode, which is normal. But sometimes, you can experiment with other blending modes to achieve different effects.
Here's how to work with blending modes:
Select the layer that contains your painterly background or texture.
In your image editing software, navigate to the blending mode options in the Layers panel. These modes are typically found in a dropdown menu or list.
Click on the blending mode dropdown menu to see a list of available blending modes. These modes are categorized into Normal, Darken, Lighten, Contrast, and more.
Experiment with different blending modes by clicking on them one by one. As you do so, observe how each blending mode interacts with the layers below it.

Step 9: Overlays
To complete the painterly look of your image, consider incorporating additional elements or details that mimic traditional painting techniques. These elements can add authenticity and depth to your composition.
Here's how to do it:
Brushstrokes: Add brushstroke overlays that resemble paint strokes. Place these overlays strategically on your image to create the illusion of painted brushwork.
Paint Splatters or Paint Drips: Paint splatters or paint drips can add an organic and dynamic feel to your painterly composition. Place these overlays strategically on your image to create the illusion of painted splatters or drips.
Texture Overlays: Experiment with various texture overlays, such as canvas or thick gesso textures, to give your image a tactile and painterly surface. Adjust the blending mode and opacity of these textures to achieve the desired effect.
Additional Backgrounds: You can duplicate the background you are using once or several times and use the masking techniques to add areas of interest, or you can layer different backgrounds to achieve a unique custom look.
Custom Elements: If you have artistic skills, consider painting or drawing custom elements directly onto your image. This personalized touch can make your painterly composition genuinely unique.
You can also customize the opacity and blending mode for the overlay.

Step 10: Refine
Don't hesitate to make adjustments to the layers as the piece begins to come together. While you focus on adding and adjusting each layer, don't lose sight of the overall composition and balance of your image.
Pay attention to these aspects:
Composition: Evaluate the composition of your image and make adjustments if necessary. Ensure that the placement of elements, including your subject and painterly additions, creates a visually pleasing and harmonious composition.
Balance: Keep an eye on the balance of your image in terms of color, contrast, and visual weight. Adjust the opacity, size, or placement of painterly elements to maintain balance and cohesion.
Color Adjustment: fine-tune the colors and tones to achieve the desired mood and atmosphere. Use adjustment layers such as "Hue/Saturation," "Curves," or "Color Balance" to make subtle or dramatic color adjustments to each layer or the overall piece.
Cropping and Resizing: If you feel that certain areas of the image are distracting or unnecessary, consider cropping or resizing your image. Cropping can help you eliminate distractions, while resizing can enhance the overall visual impact.

Step 11: Save and Share
After incorporating painterly elements, refining the composition, and adjusting colors and tones, carefully review your image. Ensure that it aligns with your artistic vision and conveys the desired painterly aesthetic.
Once you are satisfied with the final result, save your painterly composition in an appropriate format (e.g., JPEG or PNG). You can now share your transformed photograph with others or even consider printing it as a unique piece of art.

Creating a painterly look from photographs using painterly backgrounds and textures is a creative process that allows you to blend the worlds of photography and painting. Experiment, explore different textures, and let your artistic vision guide you to create captivating and unique images.
In conclusion, post-editing and compositing are powerful tools in the arsenal of fine art photographers. They enable these artists to refine their images, infuse emotion, and push the boundaries of visual storytelling. When used skillfully and thoughtfully, post-processing and compositing can elevate photography to a level of artistry that transcends the confines of reality, inviting viewers into a world of imagination and emotion.
©Carly Sullens, M. Photog., M. Artist, CPP